Showing posts with label no cost programs. Show all posts

Friday, August 12, 2011

Lego Club: A How-To Guide


I've been asked how I run Lego Club at my library, and while I don't think I do anything radically different from other libraries, I thought I'd share what I do and what I've sort of adapted over the course of this fun program.

Getting a Lego Club Started

The very first step in getting a Lego Club started is...getting Legos. Anyone who has ever purchased Legos knows they are not inexpensive. I was lucky because in my storage closet at work, I found a small starter box of Legos. But I knew that small box would in no way cut it.

I didn't want to spend too much building the collection, so I turned to the community. Through our monthly newsletter and in in-library advertising, I asked for donations. I got a couple enthusiastic responses from the start, and I collected another small lot of Legos. Again, it wasn't quite enough for the club I envisioned. I turned, too, to my friend Brian, who is a huge Lego enthusiast, and he hooked me up with another donation. But still, I knew I didn't have enough, so I had to figure out where to buy some Legos with a tight budget.

Enter MegaBlox.

MegaBlox are sold in 1,000 piece kits and they work with regular Legos. They happened to be on sale at my local box store, and I picked up 2 kits for $40. I also bought a couple packs of mini-figurines and with what I'd collected, I just hoped for the best.

Lucky for me, after the club met a couple times, we began ROLLING in donations. I mean it when I say I have 3 huge Rubbermaid tubs full of Legos. I have tons of cool pieces, and I have tons of the bases and figures. When word got out about the club and the kids started showing off their works, people began bringing us so many Legos, I almost had to start turning them away. It was fantastic.

The Club Set up

I run my club twice a month after school at 4 pm for one hour (I made adjustments in the summer). I began the club thinking each week I'd come up with a theme for the kids to build on, but in the end, I scrapped it. My kids were interested in building whatever they wanted, and who was I to stop that creativity?

In setting up the room, I put out 3 or 4 tables to build on, but I put them on the sides of the room and leave the center of the room completely open. I lay down two large table cloths (the heavy duty kind) and dump the Legos onto the table cloths. This lets the kids dig and explore all they want to -- which for some kids, is the entire point of Legos -- and then at the end, clean up is as easy as getting the pieces onto the table cloths, folding them up, and dumping the Legos into the container. Painless.

As the kids finish their creations, they come up to me and tell me what they made and what they're calling it. My first couple of meetings, I had the kids share with everyone what they made, but I found out they hated this, and some didn't want to talk in front of the group at all. So, I decided they could come talk to me and just me. When they tell me their creation's name, I write it down on a small piece of card stock, along with their first name, and then they are free to put the creation anywhere on top of the shelves in the children's area they wish.

When all of the kids have their creations up, they can wander and see what the other kids made.

After Lego Club

I leave the kids' Lego creations up until the next Lego Club. The day of the next club meeting, I take them apart and they get to start all over again.

Lessons Learned

Honestly, this is an easy to run program and one that, despite some initial costs, is cheap. Anyone can supervise it, and I've toyed with the idea of having it become a volunteer-run program.

I began the program by limiting it to those in 2nd grade and older, but I kept getting younger kids who wanted to participate. And you know, I let them. Whenever parents bring their kids, I say that the only age requirement is that the kids are able to play with regular Legos themselves. Most of the time, the littler kids come with parents who stay and play with them. I love this -- I believe Lego Club is one that is really a great family program, as so often, the parents come and play with the kids. Seeing dads with their sons is wonderful.

Which brings me to this: it's a big boys program, but not all boy. If you can, get ahold of brightly colored, pink, purple, and neon colored Legos, too. We have a pink kit, and in it were flowers, birds, and other little things that both the girls and boys have loved using. I would say bulk up, if you can, on mini figures for your Lego collection, since those are the most popular things in my sets.

When I began, I thought that having a lot of bases to building would be important. It's not. If you don't have many, you will be just fine. The kids are so imaginative and creative that they will make something from nothing. And the stories they will tell you about what they make are fascinating.

In room set up, I discovered some kids are going to gravitate to using tables and chairs, but most of mine prefer to lie on the floor in front of the Lego platter. They help one another find pieces they need, and they're cooperative in sharing. The social skills they learn here are important, and the bonding they have over the activity is one that's not easy to replicate in many other youth programs. One thing I do is provide buckets -- I have some from the Legos themselves -- and the kids who want to collect Legos to build on a table can use one of those to scour the pile then build elsewhere.

I average between 18 and 30 kids each time I run the program, which for a twice a month program that requires nothing of me other than setting out Legos and taking them down, is a great turn out.

You can make this program as challenging or not challenging as you wish, but I prefer to keep it really laid back. My kids have enjoyed it greatly, and everyone loves to look at the Lego creations the kids make. I think putting the things on display is key to a successful Lego Club: it gives the kids a sense of accomplishment AND it's perfect advertising for the next club. I do think I am going to invest in a bag of Duplos though to have out in our children's area for anytime use because the kids who look at the display have a tendency to want to play with the items. Alas. I don't yell at them about it. It's natural curiosity.

I did have one tricky incident in Lego Club that's worth noting. I mentioned that I got a lot of really good mini figs through donation; apparently, they were SO good, that one of my kids pocketed a handful during Lego Club and took them home. Fortunately for me, his mom brought it to my attention and made him bring them to me and apologize the next week. It was a hard lesson for him, and I think it's one to just be aware could happen. I don't operate with that on my mind, but it is a slight possibility. Speaking of the mini figs, I had a mom and her kids want to buy a few pieces off me, too, since they loved what I had received so much. I didn't sell them, but instead, I directed her to a couple websites that might be able to help her. In short: be familiar with where you can acquire Star Wars and other popular figures.

Bonus: this program works for teens, too! My teens are rabid about Legos. So there you go!

Thursday, July 21, 2011

Going Green: A Recycled Costume Show

The theme of the week is no cost programming, and today's program at work was one of the favorites so far this summer: a recycled costume show.

I mentioned before that there are always programs you inherit when you start a new job, and this is one of the traditional summer programs at my library. I think it's a really cool program and one I plan on keeping around. It's easy to organize and cost free, and it lets kids of all ages express their creativity.

Supplies

This is an easy one: anything recycled. But start saving things well in advance of your program, and have your staff help out. I had bubble wrap, packing paper, cardboard, tinsel, toilet paper and paper towel rolls, cereal boxes, soda bottles, and other regularly recyclable materials. My supplies also included most of last year's summer reading club decorations, which meant there were a ton of shark fins, some plastic shovels and goggles, and, perhaps the crowd favorite, the wicker luau fans like these.

I then pulled out glue, scissors, yarn, stick on foam shapes, craft fuzz balls, tape, duct tape, and a handful of other supplies I wanted to deplete.

Set Up

In the past, this program has been held under our big outdoor tent, with a "red carpet" positioned in the middle so that at the end of creation time, the kids could walk the runway to the MC. That was the plan for this year until we had an extreme heat warning issued, and I decided it was best to keep this program inside. The contingency plan involved putting all the non-recyclables on the floor and the craft supplies on one table. We pulled together a punch of tables for the kids to create on, some with chairs and some without (as I've found, the kids are all different about their preference, so I leave it open).

I didn't want to miss out on the kids showing off their creations, so my contingency was a library parade. I told the kids 10 minutes prior to the end of the program, we'd go on a parade throughout the stacks.

Running the Program

Like with the beaded creations program, I made no plans. Instead, I made myself available to the kids for helping with cutting, knot tying, etc. I told the kids as they came to make anything they wanted to, and they did!

As soon as creation time was done, we lined up and took a tour of the library. Some of the kids thought this parade was the best part of the program because they got to have the attention of all the patrons. Everyone got to oooh and ahhh over their costumes. Costumes ranged from an incredible robot (body and helmit with a jet pack in the back!) to a mask with a straw attached (so she could wear a mask and still drink water), as well as crowns, wigs, and bubble wrap skirts. The teens who showed up made themselves an elephant hat (which she plans to wear for Halloween) and a mailbox hat. These kids were wildly creative and imaginative, and I'm eager to go through our photos, since I know I didn't get to see everything they made.

Once our parade was done, I took the kids back to our creation space and told them the program was over, but they should feel free to take any supplies they wanted to to continue their costumes at home. Lucky for me, many of them did, meaning I had fewer things to put back into storage for next year's costume show.

Lessons Learned

What I loved about this program was it really brought in all ages. I had very young kids and I had teenagers making costume pieces. They even helped one another out, which is always one of those end goals.

I had my intern helping me out with this program, but were I doing it again, I'd love more help. While it requires little in terms of set up and in instruction, it sure helps to have people around for clean up and for taking photos and helping kids with some of the harder tasks, such as cutting tape or making holds through cardboard, etc.

I'd also make the parade a bigger deal -- I can't get too down about this, though, since this was a serious last minute improvisation for the fact I decided not to hold the program outside in the heat. But the kids loved it so much, I do plan on doing that part again. The parents got a kick out of taking photos of their kids marching in the parade, and the kids liked to show off everything they'd made (and not all of them made costumes, so not having a runway show let everyone show off what they made, regardless of whether it was wearable or not).

This is a program I highly recommend for all ages, and it's one that can be done any time of the year, and one that could be particularly well done during April's Earth Week. What a way to encourage kids to recycle and to think about the ways the things they use every day can be re-purposed. We don't always have to teach through lecturing; sometimes, it's as simple as letting them create and discover.

Costs

$0.

Really, what do you have to lose?

Monday, July 18, 2011

Beaded Creations: A Tween Program

I ran a no cost and extremely easy program last week that brought in 15 tweens for over an hour of easy fun that encouraged their creativity and imagination. You read the first part right: no cost. I called the program "beaded creations," and it involved nothing more than the craft supplies that took up shelf space in my office.

Supplies

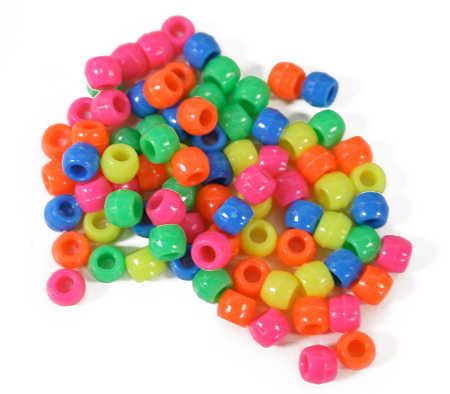
I cleaned my shelves and pulled out two boxes of beads. These included a huge tub of pony beads, as well as a number of smaller beads, fancy beads, alphabet beads, and crystal beads. I pulled out a few rolls of regular yarn, as well as fishing line thin string, some elastic, and some wire string. I still had a ton of safety pins left over from Canada Day and so I pulled those out, too. I also took out a couple tape rolls and a handful of scissors.

Set Up

I put all of the non-bead supplies on one table, save for a few pairs of scissors. That table was at the front of the room so when the kids entered, they went there first.

I grabbed a pile of bowls from our staff lounge and put a few on each of the four tables in our programming room, dumping a mix of beads into each bowl. I'm not a purist by any means, and I know I like the idea of discovery, so I mixed all the different kinds of beads together. Pony beads were hanging out with the Fs and Hs, and the crystal beads mixed with the triangle-style beads.

The Plan

Guess what? I had none. I didn't come up with any patterns, nor did I come up with any sort of jewelry for the kids to make. Instead, this was more of an open studio program, where the kids could make anything their minds could come up with. I find these programs work extremely well for this age group; they're so creative and during the school year, they're so regimented, they don't get the opportunity to just play like they need to. Yes, I said it: they need to play.

This program brought both boys and girls. The boys had just as much fun as the girls. The idea that jewelry is a girl thing isn't really common in this age group, honestly. They just want to have fun, and I'm all about encouraging it.

A couple of our boys made alphabet necklaces using all of the alphabet beads in a nonsensical way, and one of the boys found half beads he popped onto his pinkie fingers and played vikings with (then he made them party vikings by putting a ring on the fingers beneath the 'helmets'). Girls made necklaces, bracelets, and one girl used a ton of the pins to make a birthday necklace (then she gave me one of her creations to keep!).

Lessons Learned

This program was so easy and it was popular. The kids asked me to do it again, so it's one I'll definitely try out again in the spring.

Perhaps one thing I didn't think about was how much knot tying the kids would want me to do. I didn't mind it at all, but when they asked me to tie knots for their little rings, well, it was a test of my own finger dexterity (I have tiny hands, but not that tiny). I think if I do this again, I might splurge and buy actual fasteners for the jewelry so the kids could make longer lasting creations.

These sorts of programs are great for cleaning out your supplies and for encouraging creativity, and they work so well with the 8-12 year old set. You don't have to reinvent the wheel for successful programs, nor do you have to do a lot of planning or prep work. Sometimes keeping it as simple as possible is what you need to do: for the most part, these kids want a safe place to be that's not at home and they want to hang out with people their age, as well as adults who like spending time with them and laughing with them.