This year's cooperative library summer theme for children is "One World, Many Stories." As part, I've incorporated a few (and I emphasize few) programs that involve travel or foreign activities. I'm not a stickler for themes, as I think they can be a bit stifling, but I took today's tweens-only program straight from the theme: Canada Day Celebration!
Like the US, Canada has a big independence day celebration, held every year on July 1. We got in on the celebration by offering up three crafts and a treat for our attendees.
First up, treat time!
I purchased a maple leaf shaped cookie cutter from Amazon, and it cost me less than $1.50. My coworker volunteered to make the cookies, which were simple sugar cookies, and I picked up 2 cans of white frosting and 2 shakers of red and white sugar crystals. Total cost was under $10, and we had between 80 and 90 cookies.
I set the supplies out and let the kids make their maple leaf cookies however they wanted. Most looked like this:
Then it was on to one of three crafts. Myself, along with a coworker and my intern, manned the craft stations. I handled the fireworks bookmarks. For this, I cut black construction paper into 1/4 strips. I hole punched the top of each and gave the kids red and white ribbon to tie. I ended up doing a lot of the tying but it wasn't a big deal. They wanted their ribbons to look like my sample.
I then let the kids lay down thick lines and shapes in glue however they wanted to. Then, they put their glue-covered black paper into a paper box lid and were given free reign over glitter.
Their creations ranged from things that kinda looked like the fireworks I made to something else entirely. I am a huge proponent of letting the kids make whatever art they want to make, so as you can see, it was a little everywhere. And little did I expect how popular this craft would be -- some kids made 4 or 5 book marks because they loved the free access to glitter.
The next craft the tweens did was make Canadian flag magnets out of fuse beads. My lovely intern was given the assignment to figure out how to turn red and white fuse beads into a Canadian flag, and she did an amazing job. We had only two of the small beds to do the flag making on, so this station was a slower one, but the kids who did it got a kick out of their final products.
Apologies for the blurry photo! If you're curious, that flag is made up of 93 red beads and 60 white, with 17 columns and 9 rows. I've included the actual pattern below (thanks Mary!):
We did the ironing of the flags when the kids finished putting the beads together, and then they were able to pop the small magnets on the backs themselves. A lot of the tweens found this to be the harder/more frustrating craft, but they all loved the end result (and let me tell you how fun it is to see a bunch of Canadian flags around the library).
The very last craft we had was a beaver pin. I found the pattern for this one right here. I picked up all of the small beads at Walmart, but let me tell you this: finding the pins was not easy. I went to multiple stores and had multiple trips before finding enough of the right size pins. Because the right size base pins were essential to fit all of the beads onto. But! There was triumph and we had all of the appropriate pins come program day.
They turned out extremely cute, and for the kids who didn't get a chance to finish, we were able to pack up some of the beads and pins for them to take home. Some of the kids wanted to make other things with their pins and again, we were game. One girl made herself a gold medal, even.
We had both guys and girls come out to the program, and it was enjoyed equally by all. We ended up having 22 kids, which is smaller than duct tape was, but still an extremely good showing for limiting the program to 9-12 year olds only. Plus, we got to celebrate Canada and the kids really got a kick out of it. It was familiar enough and foreign enough to them to be a total blast. I think the total cost was around $50 or $60, and we had a ton of left over beads and craft supplies for another program in the future, since we planned for almost 40. You could do this program on the cheap, especially if you have a lot of the supplies already.
Wednesday, June 29, 2011
Summer Reading: Week Two
I'm a week behind in wrapping up summer reading, so this week, there will be two in a row. This is for week two, where we got to do a lot of really exciting programs.
First, the stats: I took my counts last Thursday morning, and we had 75 teens signed up for summer reading, 252 youth age 4-12, and 51 pre-readers. That's nearly 400 people signed up already, which is almost what last year's numbers were all summer long, and we're only on week two. It feels wonderful!
We ran our regular Lego and Games club on Monday, where we had 27 attendees (up from the week before). I keep this program extremely low key, and I think that's part of why it's successful. We don't have a theme, and all I do is dump out a couple tubs of Legos on the floor and drag in a box of board games. This time, no one played games but instead, they all concentrated on making epic Lego creations.
On Tuesday, we had one of our performers who is brought in through our library system. We do all of our big programs outside under a tent, since our building's meeting room has very limited capacity. The weather looked chancey all day, but we had 97 attendees. The storyteller was a bit of a disappointment, saying she didn't need anything when really she needed a sound system (which we have). She wasn't super engaged with the kids, and she wasn't observant of what was going on around her, either. The sky grew very dark about half way through the performance, and our summer camp crew (which brings in 25-30 kids to the event) just left. After they left, so did everyone else, and the performance was cut way short. It was a little embarrassing on our end, but I'd rather the 97 attendees be safe from the weather than stay and not be. We ended up having some wicked storms from that point onto the rest of the day.
On Wednesday, we had a combined tween/teen program, where we brought in author Siobhan Vivian to do a writing workshop. There was a lot of stress to get her out here, actually, as the weather that impacted our performer on Tuesday also impacted her flight into Wisconsin. After a lot of tears and profanity on the phone, we snagged her a very early flight to Chicago Wednesday morning, where she rented a car and drove up. She did a program at three libraries that day, and I'm extremely pleased to say we drew 29 attendees. Each person who came who didn't already have a copy of her book Same Difference was able to get one, and they all got them signed after the performance. I also made everyone mini notebooks to keep, which featured the program name, date, and thank yous to our sponsors. I plan on talking about this event in more detail in another post, since it was such a great event.
After the event, I took a small group of my book club kids out for dinner with Siobhan, as well. They talked about the restaurant they ate at, and the way Siobhan talked to them about it made it so cool for the kids to see how questions can spark creativity and stories. It's one of those things I know the kids won't forget -- for them, this was meeting someone famous, and it was meeting someone who was interested in hearing their stories, too.
Thursday, I did an extremely easy program for just the teens -- ice cream creations. I cleaned out our staff kitchen, which had many half-full boxes of candy, cookies, sprinkles and more from various programs, including the candy bottle guessing game, then I made a run to the store to pick up 5 large tubs of ice cream. I also picked up a jug of chocolate sauce and a couple other sauces, a bunch of bananas, and laid out bowls, spoons, and scoops. Then, we opened the doors and told the teens to have fun. We had 29 show up for this super easy and relatively inexpensive program, and many of these attendees were the kinds of kids we'd never see in the library. All for free ice cream, indeed. But you know what? It got them in. We had a little drama with this program in policing the age of attendees, as the very young kids wanted in; we tempered this by telling the older kids to bring a scoop of ice cream out to their siblings after they ate.
Friday was our storytime, but I was on a plane down to New Orleans for the American Library Association conference, feeling pretty pleased with program attendance and signups this week. I feel like I know some of the areas where I can improve for the future, but for now, it's straight on to week three, which you'll hear about in the next couple of days.
Labels:
family programs,
summer reading,
teen programs,
tween programs,
tweens
Thursday, June 16, 2011
Summer Reading: Week 1
The first week of summer reading ends today, and I thought it would be worthwhile to look back on everything that's gone on at the library this week and check the raw numbers.
First, a little explanation: I'm running three programs this year. One is for pre-readers (those birth through 4), youth (4 to 12) and teens (12-18). I'm pretty forgiving in flexibility, as I let 4 year olds do the youth program, 11 and 12 year olds do teen, and I've let a 19 year old do teen, too.
For pre-readers, parent and child work together to complete 30 activities together. You can check out the activity sheet right here. It's meant to give them literacy, print awareness, sound appreciation, and other activities to work on as parent-child and reward them for it.
For youth, children get a reading log, with each image indicating 15 minutes of reading. They can read alone or with a parent/sibling and audiobooks count. Their reading log looks like this. Both youth and pre-readers can also complete weekly check lists of activities, and all eight weeks of activities look like this.
Teens also get reading logs, and theirs are in 30 minute increments. Their logs look like this. They can also complete a teen summer passport, which is the same idea as the youth activity logs, except they only get one log all summer long, which looks like this.
After almost a week of summer reading club, we have 40 signed up for the pre-reader club, 193 signed up for the youth club, and 66 signed up for the teen club. Can I say that last year, at the conclusion of the summer reading club, there had only been 56 teens total? I'm thrilled with this week's turn out for them, especially.
During the summer, I have activities planned for every day of the week -- Mondays through Fridays, so this was the first week we were went through all of them, and they were a blast. Here's what we did!
Saturday
We had our kick off event, wherein we brought a magician, and we had a huge sign up push. We had 55 attend the magician's show, which was a little bit of a bummer number for me -- but the magician was excellent, and I would, without a doubt, bring him out again. He was great with the kids, and his humor worked perfectly for the adults, too. And boy, were my kids eager to be volunteers for his tricks!
Monday
We had a laid back, all ages program of games and legos. I pulled out a box of board games and dumped out my legos, and let the kids go to town. We had 20 attend this program, where I laid on the floor and played a pretty amazing game of Memory with a 6-year-old and a 12-year-old. I was happy to announce I beat the 6 year old, but the 12 year old completely kicked my butt.
Of course, all of the kids who made lego creations got to display them in the children's area -- and that is, without doubt, my favorite part of lego club. I didn't initially bring out the index cards for kids to put a name for their creation down, but they begged me for them, so I obliged.
Tuesday
We had our big all ages program in the outdoor tent in front of the library. We had an art party, where four staff members brought a craft for the kids to do. It was a bit of pandemonium, as we had 110 attend this program.
Since this year's theme was world travel, each craft had something to do with a foreign country. The kids made god's eyes (Mexico), paper crocodiles (Australia), fans (Japan), and harlequin masks (Italy, pictured at left). My coworkers did an amazing job helping the kids out, as I was busy running around making sure everyone was covered for supplies, ducking in and out of the building to tackle any questions that came up.
I would do this sort of program again, but I'd definitely set up more tables. I was going to be thrilled if we had 60 or 70 attend this program, so 110 was excellent. This program was quite inexpensive, as most supplies were on hand already. I believe I spent $40, and I think another coworker spent about that. For 110 kids, we spent about $.50 a kid, which is amazing.
Wednesday
This was my tweens-only program -- the first of its kind at the library. I decided it was important to give 9-12 year olds their own program this year, with activities geared only toward them. Sure, it's a lot of work to do this much, but the return on investment was insane. Our first program? Duct tape creations.
I planned for about 20 kids. When I went to Walmart for tape, I thought I'd gone a little overboard on buying tape. You can make that judgment to the right here. I personally knew how to make wallets and flip flops, so I pulled out a couple examples and raided our recycling room for cardboard. I laid it all out, and I told the kids as they came in to go to town, but they could find me to help them any time.
They knew EXACTLY what they wanted to do. It was incredible to see -- wait for it -- 40 kids (!!) show up for this program. Most knew what they wanted to make and went to town, while others came and had me walk them through (or in some cases, make for them) wallets and flip flops.
I love this age group. They are completely respectful and caring, and they all cleaned up after themselves. They were incredibly creative and funny, and spending an hour and a half of them was a blast. I'm so eager to see them again next week.
Perhaps what struck me as most valuable about this program was that it drew in a significant number of Hispanic youth. We have a large Hispanic population in town (over 30%), but they don't come much to library programs, for many reasons, including that they believe it costs money, that they aren't welcome/there isn't anything for them, that they need a library card to participate, etc. I made it super clear in classroom visits that there was no sign up, no cards necessary, and everything was completely free. To see so many of these kids at the library really made me feel good. I hope this is a trend that continues all summer long.
Thursday
Today was my laid back day at work -- just the teen book club meeting. Though I should say it was, indeed, my favorite program because I love these kids to bits and pieces. They're smart, thoughtful, and love to talk all things books.
This week, we talked about Siobhan Vivian's Same Difference, as Siobhan is coming to the library next week. Talk about a book we had a lot of great things to talk about. Usually, book club discussions run about 30 minutes, and then my teens want to do something active (and, as always, I oblige). This time, we talked an entire hour about this book. The kids loved this book, and they thought Emily (the main character) was one of the most realistic characters they'd read in a long time.
Perhaps what made this particular book club meeting special for me was that I could give my kids this book to keep. With the grant I won, I purchased a ton of these books, and I was able to let them have them. Then, a few others asked for a copy for a friend who would be coming to the event next week, and it felt so nice to say yes, yes, yes.
When we finished our "formal" book discussion (which is never formal), we talked about other books we love. One of my girls gave rapid reactions to a pile of books she'd checked out a couple weeks ago and read, and it was amazing; she'd give her gut reaction then a single statement after which was hilarious. And in the last few minutes before the library closed, I saw all the girls check out piles of books before heading home. Whoever says teens don't read....has never spent time in a real library.
Friday
Obviously, I can't post about it since it hasn't happened, but this is our storytime day. One of my coworkers does our storytimes, but I suspect turn out will be pretty good, since it's the first time back in a month.
Other things
Amid the programming, I found time to put together a few more reader's advisory guides for our teens, which you can find here. I wrote up guides to sports, mystery, and historical fiction this week, and my intern (I'll talk about that in a second!) made up guides to science fiction, fantasy, and fairy tales/fey stories.
I've made up a schedule to keep the teen blog and facebook up to date and active, and I've really enjoyed it. It feels like having a schedule makes it more active and makes me more engaged, too. This week, I posted teen book reviews, linked to a story about free audiobook downloads for teens at sync, and put a contest up for a signed advanced copy of Ellen Hopkins's Perfect.
This summer, I have an intern, and she has been a complete and total life saver. I threw her right in, and she's been so good at helping me with programming, with reader's advisory guide creation, and with the myriad of activities I tackle in a day. She's been instrumental in getting my teen summer school mobile collection processed, and she'll be key in making that a success, too. You'll hear about that more in July! She's doing it for free, but her resume for graduate school and portfolio for a future job will be great -- she's making reader's advisory material because (wait for it) she's reading the books, too, which as we sadly know, isn't the case with all youth/teen librarians.
All in a week's work, and only 7 more weeks to go!
Wednesday, June 15, 2011
Designing eye-catching fliers: a tool kit
I am passionate about good design.
Perhaps it comes from years working in newspaper and yearbook offices, obsessing over pica spaces and columns that line up. I took tons of classes and workshops on design, spent hours learning how to make things eye catching and visually appealing.
I bring this to my job, and I obsess over making my fliers, posters, and hand outs as nice looking as possible.
And I'll give you some of my cheat sites to help you pick out catchy images, fonts, and how you can get around some of the firewalls that might trip you up.
First, let me show you one of my recent designs (it'll be familiar):
I know the picture's not the best, but you get the idea. It's a simple image with bright colors, and the font is just different enough to stand out.
As for the design, I used Microsoft Publisher. It's not my favorite publication tool, as I'm an ardent believer in InDesign, but I'm using what tools I have. I just popped open a blank page template.
I pulled the image from Vector Stock. It's a site you have to register for the site, and not all of the images are free. But, there are nine pages of free vector images. Many are catchy enough to use alone, and most are perfect for adding text/manipulating to your purposes.
As for the font, I utilized 1001 Fonts. For this particular sign, I used Protest Paint. Download it, install it, and you're ready to go.
Easy peasy. Let's try another design file.
This is the inside of my summer reading club flier that went to all of my middle and high school students about the teen programs. Although this one was a little time consuming, I think it's an effective and eye-catching design. The time was worth it.
Though it looks complicated, it's really not. And you work it top down (this'll make sense in a second).
First, I grabbed my fonts from Urban Fonts. It's the Speedway Star font for the bulk of the text on the page. The title is in Iron Man.
Usually, I avoid pulling my graphics from Google Images, for sake of avoiding any sticky copyright issues. But because all of my images were super simple this time, I just image searched all of these. I picked the highest quality images and placed them beside the text boxes. I added my arrows to line up the image and the text boxes. But it all looked like it still needed to be ties together some how.
So I pulled up one of the clip art files on the CSLP disc -- that's the Collaborative Summer Library Program for those who aren't part of it and then lightened it through image filters built right into Publisher. Then, I sent it to the back of the file (see what I mean about working top down?).
I make it sound easy, and it is. You might do a little adjusting, but getting all the components together was simple.
All right, let me give you one more shot of something I've designed and show you the tools I use:
This is one of my tri-fold reader's advisory tools. Like the other pieces I've showed, this was done in Publisher. In Publisher is the option to create brochures, and when you do that, you can then completely customize the look of the templates. So, I took what was a boring green template and splashed it in bright color. This is super easy to do and gives a design something beyond a typical template look.
The fonts here are the Protest Paint and Speedway Star, as I linked above. All of the cover images are from our library catalog (which often is better than the Google Image search results).
As for the pictures on the far right panel, let me introduce you to my favorite tool in finding images: Stock Exchange. It's another site you have to register for, but the registration is free and easy. When you search, you'll pull up paid images first, but in the center, you will find free images you can use. They're high quality photos and clip art, so you're bound to find something great that is free here. I use it as my go-to image search and rarely am disappointed. In this design, I actually saw the sucker image first before choosing my template colors -- I let the bright stripes help dictate what colors to make the borders and backgrounds.
So now that I've walked you through three of my designs and sources, let me give a few tips and tricks to help you make your publications eye-catching and visually attractive.
- Play around: you'll never learn how to make a good design without trying to. One of the easiest ways to learn is to take a design you like somewhere and replicate it. Make a dummy of it on paper first if you need to (which means take a sheet of paper and sketching it out in pen to get a feel for how things "flow" in a design). Then do it in your design program of choice. For what it's worth, you CAN do good designs in Microsoft Word, but it's a lot of work. I recommend Publisher or InDesign, but you can also use Powerpoint if necessary. Also, those who are comfortable may also try their hands at Prezi to make a printable design; it, too, isn't perfect for static design, but it can work.
- Edit your images: I do my image editing in Paint (I know! The lamest program has a use). But I also use Picnik. It, too, is free and can be a lot of fun in inspiring good design.
- Image sources: I've given you some image sources, but don't forget about the Flickr Creative Commons, too. Be careful here and make sure you understand the agreements, though. Some are free to use and manipulate however you want to, but others are not.
- Cheat: Can't download fonts on your computer (I've been there). You can cheat. If you use Urban Fonts, you can preview your fonts. Unlike 1001 Font's preview, in Urban Fonts, you can change the background and text color in the preview. Make your text size choice small enough to get all of the text in you want in the preview box and preview it. You can copy the image of the preview text from here -- then you can paste that into your image editor of choice and cut down to just the line of text you need. Voila!
- Edit: Always, always, always proofread. Nothing stinks more than getting everything to fit perfectly in your design and learning you misspelled a word or left one off completely. And nothing is more frustrating to those who receive your stuff than seeing a huge mistake.
- Keep trying: Sometimes your instincts don't always work. Keep trying. It can be exceedingly frustrating some days, but the end product of well-thought design is always worth it. And always keep looking -- there are tons of free sources out there for getting better and there are plenty of places from which you can gain design learning opportunities. Look online, and look to other professions, too: graphic design, journalism, art. See what works and emulate.
Monday, June 13, 2011
At the Zoo Storytime
This was my final story time of the school year, and I'm glad it ended up being one of the most fun. I brought a pile of books with me, and for each group, I read a few different books. The zoo theme was inspired by Abby (the) Librarian's post about a zoo theme and because one of my groups this week had just gotten back from their own trip to the zoo.
We started out by singing "The Animals at the Zoo" (tune of "Wheels on the Bus")
The snake at the zoo goes hiss hiss hiss,
Hiss hiss hiss
Hiss hiss hiss
The snake at the zoo goes hiss hiss hiss,
All day long
and so forth. The beauty of this song is it can go on as short or as long as the kids interests dictate, and they can be the ones in charge of deciding what animals to sing about. I'm a huge fan of letting them dictate the animals we sing, but if you do that, be prepared to decide what noise a zebra makes stat. I suggested to the day care kids (they're 2 - 4 years old) that the zebra could snort, but they weren't having it. . .
Then I read these stories to the different groups:
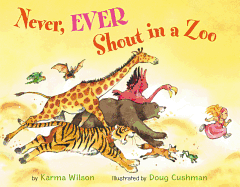
Never, Ever Shout in a Zoo by Karma Wilson
If you haven't noticed, I'm a huge fan of Wilson's books. The text is just enough rhyme to work without being overpowering.
1 Zany Zoo by Lori Degman
This story is way cute, and the kids in all of the groups loved it. A little boy sneaks into the zoo before it opens and sees all of the crazy hijinks that happen when one of the animals gets a key and lets the others loose. The pictures were the favorite part to the kids, who loved looking for the sneaky fox in some of them.
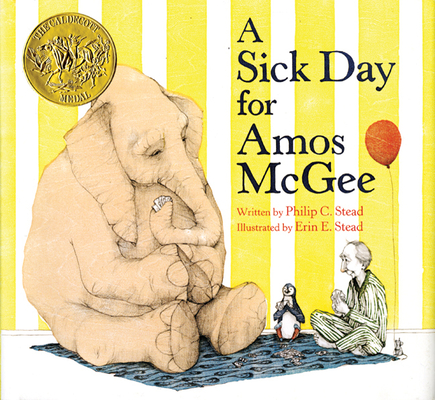
A Sick Day for Amos McGee by Philip C Stead
I only read this one to my oldest group, which is a kindergarten class. They absolutely loved this one. It's such a sweet story, but I think it is geared a little older than preschoolers. I was worried it'd be over the kindergartners' appreciation levels but I was so wrong. When I finished, they wanted me to reread it.
Dear Zoo by Rod Campbell
This popup book was one I could have the kids participate with. Each time we got to a new page, we had a flap to open, and I had the kids call out what they thought was inside. And it was the frog that tripped them up every time. A fun book and they begged me to read it more than once. But I still said no because of the next book.
From Head to Toe by Eric Carle
I bought this one in extra large, and I had the kids participate in doing the actions. What fun! I had to give them the warning to be very careful when kicking, but they were all very good sports about it. This is the story they begged to be read more than once, and I did it more than once in each class because I had a blast watching the kids act out the animal motions.
After reading, we played our last game of "Little Mouse," and my preschoolers each begged to kiss him goodbye. This is the same preschool group that broke my original little mouse with their kisses and hugs, but oh, it's worth it. They get a kick out of it.
And finally, our craft. I debated what I wanted to do, but then I pulled this one out since it was easy, fun, and one that required nearly no prep (after the spider hats and prep therein, I was ready for easy...as were my volunteers!):
We made our own snakes. This is such an easy one, and the kids have a blast making the snake exactly how they want to.
To make it, cut a plate into a spiral, until you have a small circle in the center for the head. Color as you want to, then glue on wiggly eyes and a small piece of red felt for a tongue. Voila!
Saturday, June 11, 2011
Summer Reading: A Passive Program
We're doing three summer reading programs for kids this year, separating pre-readers (birth-4), youth (4-12) and teens (12-18). Those who fall in between are welcome to choose which they want to join.
I won't go into details about the program structure yet, as I want to see how it plays out for a couple weeks first, but one of the things I'm doing for both the teens and the youth of all ages is a weekly passive program that looks like this:
I bought 8 water bottles that were sold with the summer reading theme for kids and 8 for teens (the dark blue nalgene bottles). I then went to the grocery store and bought a ton of treats -- goldfish crackers, m&ms, skittles, gummy words, animal crackers, etc. In each bottle, my volunteer and I counted out candy, something different for each of the 8 weeks of our program, then closed the lid. Every week, the kids and teens each have a shot to win the bottle of candy for guessing the number inside. Ah yes, it is tricky, since the kids can't actually see what's inside, so they have to believe in the sign:
Every Monday, we'll go through the responses and the kid with the closest answer wins.
There are pre-cut sheets of paper asking for name, phone number and guess for them to use right at the desk, as well.
I already know this is one of my favorite programs this summer. Why?
It gets the kids and teens to come in every week. It's exceedingly simple, requires virtually no staff time (except for when we counted out the candy and when we'll go through answers) and yet, it's one that even today, on our kickoff date, we had a number of participants in. Everything's already in the bottles and sorted, so it's a quick Monday morning prep program, and I cannot wait to present the winners their little souvenir each week.
As I mentioned, today was our kickoff for the program. It was cold and rainy, and since our events are outside under a tent, the turnout was a little disappointing for our magician. But the magician was excellent, and the kids who were there had a total blast. The jokes were just right, too, that the adults could enjoy them. I had one mom tell me how fabulous the performer was, too, which I relayed to him afterward (when he gave my intern and I some other magic tricks).
So far, sign up looks good, and there are almost as many teens signed up as littler kids. My goal's to double the size of teen participation this year from last, and we're already at nearly half of last year's numbers on our first day.
Labels:
passive programming,
performers,
summer reading
Wednesday, June 8, 2011
Tour my new, improved teen area!
I am in the last days of getting everything together for the summer reading program. I run the programs from birth through 18, so it's a lot of work and a huge payoff, too, I think -- I'll be updating about that as it goes along.
After I returned from my vacation, I came back to find one of the things I wanted was most of the way done. It was my goal to expand the teen area, since our space was tiny and cramped, if you remember. Since we're under strict collection standards through the county, we can't weed much. But a little creativity, a lot of man power, and a lot of thought went into making my teen area nearly TWICE the size.
Let me take you on a tour of the new space (see link above for the old):
This is taken from near the reference desk looking in. If you'll remember, the teen section started behind the face-out shelf holding new materials. Now, it also includes the entire range on the left, as well.
Let's get closer.
This is my new books area. It's also where I put the bookmarks I buy or get sent. On the cart on the right are our magazines.
This is a shot of the open space now for the teens -- I pulled the rug across, so it's clearer that the entire space is theirs. I've got some other aesthetic ideas to help, as well.
For now, let's look at the entire new range of shelves and what I was able to do with them:
Starting at this end, I have my Playaways (which we were just able to put out this week in the shifting!). I'm super excited to have them ready for summer reading. The ones in the children's area have been circulating well, and I am hopeful the teen ones do, too.
The next set of shelves holds our teen non-fiction. We have more than this, but this is the browsing collection, rather than the research-type materials. Just below those books are my new reader's advisory tools. You've seen my trifolds before, and now I've got two acrylic holders for them. The bottom set's empty, but between my intern and I (and that lovely grant I got), we'll be filling those up in no time.
Oh, and we made this incredible sign
I pulled up a free vector image I liked from Vector Stock, then added my text. I thought it was eye catching.
Moo-ving on (I know, I know)
This is now where fiction begins. Having 20 some extra shelves was so helpful, and as you can see, I still am staggering how they are sitting on the shelf. The bigger series books, as well as some of the books by one author that have a real "brand" to them (such as Deb Caletti's paperbacks) are also stacked sideways. It actually can take up less room on a shelf.
There's the shelf in its full glory. I LOVE how the teens truly have an entire space now, and it's closed off enough for them (while being open enough to detract any poor behavior).
Now that fiction shifted, these sets of shelves opened up quite a bit more! I think they begin at D now for fiction, and the top shelves, which once held the non-fiction, can now become areas for:
Book displays, like my world travel one.
Program displays, like the one for my author visit. I love this so much!
And a display space for my teens' Lego creations. The top shelf features one of the scenes from AS King's Please Ignore Vera Dietz (the scene where she is reading notes in a tree house), and the bottom features a battle scene of some sort on the right, and the zombie apocalypse murder film house on the left. Really. That's what it was called and what is going on there.
Here's the chair alcove with my posters. Cozy but not too cozy.
More fiction on this side. I wanted to show off where my Post Secret card project cards went. This summer, my teens can earn prizes for creative projects, and I'll be displaying them in all these little nooks around the teen area.
This is the far side wall, also completely full of teen fiction and my big bulletin board. It looks SO nice now, open with room for a little more growth. My bulletin board is sadly no longer covered in that paper and many of the cork tiles are, how to say, jumping ship in the heat. My intern and I will be tackling that project before Saturday's summer reading kick off and you will surely see it here.
I'm so lucky to have gotten this much space, and I'm so eager for the teen to be able to see it and really make it their own space. For such a small library -- we're in a town of under 10,000 with a service population of about 14,000 -- I have a wonderful space and great resources for my teens. I can't wait to see how they utilize them this summer, especially after marathon classroom visits (every 6th - 10th grade class in town, not counting the non-teen kids I saw, too!). But what I'm trying to highlight in posting about this is how easy it is to make a space, even with a small space. We aren't all lucky enough to have incredible spaces, but we can make what we have pop and always aim for just that little bit more.
Sunday, June 5, 2011
Preparing for summer reading club (a story in photos)
Preparing for summer reading -- which is less than one week away for me -- looks a little like this:
I'm getting in a lot of relaxing outside in the beautiful heat (the 90+ degrees and humidity are things I look forward to after a few years in Texas).
Then there's a lot of this, too:
All of those books are the galleys and finished copies of books I'm extremely fortunate to receive throughout the year for review consideration. A small number are signed, will be used for book club, or are appropriate for the mobile collection I'm building. But the rest? They are the prizes for my teens this summer. Virtually none have copyright dates before 2009 and many aren't even out yet, which means these kids are getting books they want to get their hands on.
It also means my bookshelves at home have breathing room for me to fill up with books I am dying to buy but have put off:
An entire shelf and a half!
But let's not fool ourselves. This is how it really is, both the shelves and myself in this final week before summer reading kicks off:
Subscribe to:
Posts (Atom)