Showing posts with label programs. Show all posts

Tuesday, February 12, 2013

Program success: Mardi Gras Party


I am very anti Anti-Valentine's Day parties. It's not that I'm against what the programs are, but I'm very against the terminology. Alternative Valentine's Day or other such titles? They're great. But anti makes Valentine's Day something to be against. Which is silly.

Rather than doing a party in that style this year, though, I decided to offer the teens a Mardi Gras party instead. It was a hit!

Here's what I did:

I set up the program station-style, offering the teens a few options for activities. I had a station for cupcake decorating. My co-worker ordered 3 dozen unfrosted cupcakes from a local bakery, then she purchased green, gold, and purple frosting (the squeeze kind for maximum decoration ability), gold spray frosting, and sprinkles. I provided napkins and plates.

One station was my bead station. I went to Mardi Gras a few years ago and had about 15 pounds of real deal beads. I let the kids have at them. I thought they'd want to take a lot more than they did, but the kids were conservative in their taking. Even if you had to buy the beads, they are quite cheap to acquire.

I also had a mask making station. Do not underestimate how much teenagers love unrestricted access to glitter, gems, and feathers. I provided card stock, colored paper, and markers, crayons, and pencils, as well as scissors, glue and popsicle sticks. The mask above is the one I made, but the teens were super creative. I printed out about 6 different templates in the event the teens wanted them. A few did, but not all. Some went to town on their own.

To show off the face masks, my coworker brought in an old frame and I took digital photos of the teens posing behind it (faces obscured for obvious reasons, but you can see the tips of their masks):


The teens loved this, and I think there could be an entire fun program in doing photos using various frames, costumes, and teen-designed creations. The opportunities then to play with those images digitally, too, could offer even more.

The final event I did for the teens was a scavenger hunt so I could name a King and Queen of Mardi Gras. I did it early in the program and wish I'd waited because it was such a hit. I hid 45 chocolate coins in the programming room, and I told the teens the person who found the most would be King and the second most would be Queen. When one of the girls had the most chocolate, I told her she could pick to be King OR Queen and she wanted to be Queen. So I let her.

I wanted to give the winners a baby (since that's what's traditionally hidden in King Cake) but we couldn't locate any babies. So instead, I gave the winners my big Troth Parade pendants. They totally loved it (the kid in the photo about on the left has one of them).

Of course, in the background of the event, I was playing some Preservation Hall Jazz Band. I asked if they wanted the music louder than it was, and did they ever.

I had the program at 4 pm, which was an ideal time to do this. The teen area was PACKED with kids at 4, so I wandered over there, told them there was a program with food, and they came. And they didn't just come for the cupcakes -- they stayed. We even had a visit from the local paper who took photos. I'm eager to see how those turn out.

The total cost of this program was minimal: cupcakes and decorations, as well as whatever supplies you may need for mask making. The music came from our collection, the frame from a coworker, and that is all. This was such a great opportunity for me to get to know our teens (since this was my first program at my new job) and I got to pick their brains for ideas for future programs. I talked to them about the books, movies, tv, and music they liked and didn't like. Not only did I get to pick their brains, I loved spending time talking with them while they were making masks and finding out what it is they love doing. The girl above? Duct tape fiend. Her brother ended up showing me one of her creations which was so impressive, I made him email me the photo so I could post it on the library's Facebook to her credit.

I would do this program again in a heartbeat. I might add another station or two, but really, the kids came to hang out and eat. I can't complain about that.

Next up for us? We're doing a Fan Art Night as part of Teen Tech Week. I already heard some of the kids talking about how excited they were to do it.

Tuesday, October 18, 2011

Falling into Art


This fall for programming, I decided I wanted to reach out to a new group that wasn't being reached as much as I'd like -- the preschool to 2nd grade demographic. This is a fun age to work with, as these kids love trying new things. I thought long and hard about what sort of programming would work well for this group; I'd had luck with our stand alone programming, such as our Princess Tea and our Superhero Party, but I wanted something more regular.

Then it hit me: art! We're not talking about crafts here. We're talking art. The kind parents hate doing at home because it's so messy. Since we're a library, and we're used to messes, this seemed like the perfect outlet for these kids to express their creative urges. I wanted more than simply projects, though. I wanted this program to be about tactile experience, too. I wanted to give kids a ton of different options for creating and I wanted it to be done through means that would be unique and develop some of those fine motor skills that are so important at that age. Of course, these programs translate well for older kids, too, and at my library, sometimes big brothers or sisters have stopped in with their younger siblings, and they've found making art just as fun as the little ones.

I bought a few key supplies before fall and winter programming began to prepare for this program, and I made sure on all of our advertising that it mentioned these art projects can get messy and to dress for it. I've had no complaints about that, and by purchasing large, pump-lidded paints (pictured above and purchased through Discount School Supply), as well as large plastic lunch trays (also through Discount School Supply), I've ensured that what could turn into a very messy project is actually very manageable. Washable trays keep tables from becoming makeshift art pieces quite nicely.

In the program, I like offering more than one project, allowing kids to do any of them they like or all of them, too. If you're looking for a fall project, here's what we did earlier this month!

I focused all of my ideas on leaves this month, and the day of the program, I went for a walk up and down the street where my library was, picking up leaves in a wide variety of colors, shapes, and sizes. Though I felt a little like a crazy lady picking up leaves from people's yards, no one looked at me twice. Perhaps I've a reputation. Alas, as you can see above, I filled a small storage tub with them. Cost? $0.

Then I set up two of the three projects at one table:

I spread a pile of leaves down the center of the tables, with a project on either side. On the right, this:


Leaf rubbing! I pulled out a box of our crayons and made an example of what leaf rubbings looked like. This is a satisfying project for kids because they get to be a little messy with coloring and still enjoy seeing something that looks like a leaf. It's one they can make into something really artistic and it's one that they can simply enjoy doing without a plan in mind. We had a little of both.

On the left side of the table, this project:

Leaf collages. The kids were able to put leaves into any shape or design they wished to (and some simply piled them one on top of another) and then I put down a piece of contact paper to keep them in place. The nice thing about this project is that the leaves will stay nice for a long time, making it a piece of art they can hold on to for a long time. Supplies needed? Scissors, contact paper, and construction paper. All of those are things probably hanging out on a shelf in your supply area for free.

On the other side of the room, I set up our other project -- one that required the lunch trays, clothes that can get messy, and ample paper towels and hand wipes for the kids (and parents, too):

I pulled out a pile of paper plates, some paint brushes, a couple cups of water, and, as you can see on the far right, the remaining box of leaves. The third project was making these:

Leaf prints! For this project, the kids pulled out leaves, painted them however they wanted to (yes, right on the leaf) and then pressed them down on the paper. While the kids were doing this, I kept trying my hand at it, as my example didn't seem to do much to show the veins of the leaves. I eventually found -- thanks to the help of kids who were much smarter than me -- that painting the back side of the leave would highlight the veins a lot more. Lesson learned.

This simple-to-assemble program was a big hit, and even after some of the kids finished all of the projects, they went back and made second and thirds of some of them. The cost is little more than picking up the leaves, and we probably have plenty of those to spare this time of year.

These programs are great for the family, as often this age group wants a little help from mom and dad. But what I think is important to remember in doing a program like this is less about making the right kind of art piece and more about experiencing the process of making art. As you can see, my examples are extremely simple and even, if you will, lazy. I don't want the kids or parents to feel like they need to make things the way I do. Art is about expressing as you want to, and while kids are usually so eager to do that, it's often parents who insist on making things like examples (storytime crafters are probably familiar with this phenomenon). In these projects specifically, there are so many sensory elements to the art, and I think it's important to step back and let the art come to the kids. If they want to just paint a leaf and not press it, let it happen. If they want to just paint and not bother with the leaves? Let it happen.

Tuesday, August 9, 2011

Planning for Fall

One of the truths of youth librarianship is that there is never a break. In the midst of summer reading, you have to plan out fall and winter programming to get publicity rolling enough in advance and to start thinking about using whatever you have left in your budget. Plus, as soon as summer reading's finished, you want your kids to know what's coming up in the fall.

I've been planning and brainstorming for a month or so about programs for the fall, and last week, I turned in my final plans and ideas, and I thought I'd share them, perhaps spurring some ideas for others who are scrambling or for those who can offer me some tips and ideas in advance.

First and foremost, we're offering up two story times again, one for toddlers and one for preschoolers. I don't do in-house story time, but I will be doing outreach story time again. So far, I'm going to the elementary school 4K classes again twice a month, and it's likely I'll be doing the same with one of the local parochial schools. I love getting out and reaching the kids in the classroom, and I'm excited for a couple weeks to plot out my themes and pick out my stories and crafts. I'm going to try a bunch of new ideas and techniques this coming year, especially since I'm now a storytime veteran, rather than a storytime newbie. I don't feel like I'm going in blind and clueless now -- I've got it down, and I LOVE the preschool/4K age group. They're fun to see regularly.

We're offering Lego Club again on Monday afternoons twice a month. I think this year will be a great start, since the kids are already familiar with it, and I'm debating whether I want to mix it up with offering themes/challenges or if I want to keep it as it is, which is a complete free build.

I'm starting up a new program this fall that I am extremely excited about. I planned it without funding in mind, but I did receive a small grant from Kohl's, and the funds will go toward it. It's my Exploration Art Studio, geared for preschool through first graders. The goal is to have an open art studio for the little kids, where we'll offer 2 or 3 different art stations and ideas, and the kids can get messy. It's once a month after school. For our first session in September, we'll be painting with glue and making sticky collages; in October, we'll be doing nature weaving, leaf rubbings, and other nature art; in November, we'll be having a huge Play Doh creation session; and in December, we'll do rock painting, food painting, and bubble painting.

We have three sorts of age groups for stand along programming, and that's all ages, tween, and teen. We're offering something for every group every month.

All ages

For September, we're doing a stuffed animal sleepover on a Thursday night, so our patrons can pick up their animals the next morning, which is when our preschool story time is. They'll come in their pajamas for a night-themed story time, then we'll make a small craft, followed by a night in the library (with photos!) for their toys.

October means we'll be doing our pumpkin carving program again, and this time, we're doing it so that we clean out the pumpkins during the day before hand (when the kids don't have school) and then the carving will be the day after (another day off school for the kids). I'm hoping this cuts down on a late night at the library and entices a larger group of kids helping clean out the pumpkins.

In November, we're going to do Giant Monopoly again. I did it in the spring to a good size group, and they were super eager to keep playing. I figured since we have all of the pieces, we might as well do it again. It's a free and easy-to-run program, and one that's a lot of fun.

In December, we're switching things up. The idea of doing a gingerbread house making program turns my stomach a bit after last year. It's SO costly and labor intensive, and I really don't care for it. Instead, we're doing the traditional program of bringing Santa to the library for pictures, and while that's going on, we'll also be making ornaments for the kids to keep and ornaments they can hang in our trees outside the library (oranges and pine cones to attract the birds).

I've become quite serious about the idea of giving kids things to do during their school breaks, since it's when they ask for things to do (and when they tend to get dropped off at the library), so I'm also offering a pizza and a movie during the holiday break. I'm not sure what we'll watch yet, but that's one of those things I can figure out a couple weeks before and be fine.

Tween Programs

After having such great turnout and excitement for this programming during the summer, I'm continuing it in the school year once a month. All of these programs involve making something, which is what this age group LOVES doing.

In September, we're making wrapped bracelets and marble magnets to celebrate school being back in session.

October is when we'll be combining our tween program with a teen program, and we'll be having a Monster Mash. We'll make monster bookmarks, monster tubes, and felt monsters. The kids will be able to make one or all of them.

I'm actually mixing it up in November and doing something wild: steal bingo. They'll play a normal game of bingo, but instead of picking out a prize, they'll pick out a mystery present that'll be wrapped. A lot of them will be weird things from the dollar store or left over summer reading prizes. After playing for a while, the kids will all open their prizes, and then the fun begins -- we'll keep playing bingo, but this time when someone wins, they can steal a prize from someone else. It should be a blast, since this age group sees this as fun instead of competitive.

December's program will be a recycle. Since our duct tape program was so popular this summer, we'll be doing it again. It'll be right before Christmas, so we'll make duct tape presents, naturally.

Again, since I want to offer something during the winter break, we'll be doing an additional program in December for tweens (and teens): bleached shirts. The kids'll bring a dark shirt, and we'll provide some creative ideas and bleach pens. Easy and fun.

Teens

It feels like I offer a lot of teen programs, but that's because the book club meets 2 or 3 times a month in addition to other programs. This fall/winter, we'll be reading I am J, Clarity, Rot and Ruin, Glow, Want to Go Private, Small Town Sinners, Between Shades of Gray, Brooklyn Burning, Divergent and My Beating Teenage Heart. I think it's a great mix of mystery, paranormal, realistic, dystopian, and historical, and they're all titles my teens were eager to dive into.

In September, we're doing a lock in that my teens have pretty much planned out for me. We'll be doing some craft-y stuff (non-pressured at tables they can choose from if they want to), gaming on the big screen, music, food, a pinata, and we'll also be doing cover redesigns. I cannot wait to talk about that because my kids came up with the idea. Oh, and we'll also be giving Justin Bieber a makeover. Ahem.

In October, we'll be celebrating Teen Read Week by having a week-long contest for the teens, and we'll be offering programs that include the Monster Mash (with the tweens), Pizza and a Movie (we'll be watching I am Number Four and serving pizza since one of my regular teens is obsessed with this book), and perhaps the program I'm most excited for, which I'm calling If It Floats Your Boat. We'll offer up stuff for making root beer floats and playing book trailers on loop. They can enjoy a treat and pick out books without any pressure.

November's program is going to happen on 11/11/11 and it is -- wait for it -- Minute-to-Win-It. My teens loved the Death by Chocolate Party, and when I proposed this idea, they were equally as excited. Wacky minute long challenges in the library? Who could resist it?

In December, the teen program will be the same one as the tween program with bleach tee creation.

Volunteer Fun

Both my tweens and teens will be able to help out with pumpkin cleaning, which I am billing as a program itself. They'll get pizza and pop and help gut pumpkins all while earning volunteer hours. I did this last year, making it sound more like a program than a volunteer event, and I had a good turn out. I'm hoping by doing it on a day off school for the kids and advertising it in advance, we'll get a bigger turn out and it can become an event itself.

I can't wait to put these plans into action, as I feel like the line up of programs is really strong. And if you're curious, I have started plotting out next year already, too, and I'm super excited about those as well. Now that I've been in the job for a year (and in the field for three now!), I feel like I'm beginning to get a good grip of what works and what doesn't work. I'm also able to gauge what my skills are and whether I need them or not to make something happen -- see the Superhero Party, where I had no idea or background whatsoever and feel like I put together something fun and exciting for the kids.

What's on your plate for the fall/winter? Anything you're excited about? I'd love more ideas, so spill 'em if you've got 'em!

Monday, July 25, 2011

Chocolate Olympics & Death by Chocolate

While last week I talked about programs that didn't cost money, today I'm going to share two programs I did (that were essentially the same thing) that ran me about $90 together. For drawing 60 kids, I think the cost was definitely worth it, but I think this is the kind of program that could probably be modified in many ways to be cheaper.

This is also a staff intensive program, unless you run it in a more competitive way than I did. I chose to do stations, rather than group events, except for the final contest. I had myself, two volunteers, and an additional staff member to help out, but again, I think modifications can easily be made.

I have photos from my tween stations, but I'll talk, too, about the other events I did for the teens.

The Set Up

I brainstormed and researched different ways of running this program until I found the right combination of events for my tiny space. I did plan it with the intention of doing it outside under our big tent, but with the weather throwing us a heat wave (and, um, chocolate not being good under those conditions), I had chosen the right activities to modify it for primarily indoor space.

Supplies
- Dark chocolate bars (I bought 2 of the 10 packs, but you can do more or less)
- 15 different types of candy bars (you can use more or less)
- 2 bags of mini candy bars for prizes
- 12 boxes of chocolate pudding
- Sour gummy worms
- 2 family size bags of plain M&Ms
- 1 family size bag of whoppers
- 2 large containers of chocolate sprinkles
- 2 family size boxes of oreos
- 1 or 2 bags of Hershey kisses
- Plastic cups
- Plastic spoons
- Pie tins (these were the most expensive items I bought)
- Napkins
- Construction or other painting/drawing appropriate paper
- Masking or Duct tape

The Program

Let's go station by station. At the tween event, two of the stations were set up to be unmanned, though we ended up manning one of them out of sanitary sake. In no particular order:

First up: the "Chocolate Puzzle." This was our unmanned station that we used in both programs (reusing the same materials). I purchased 15 kinds of candy bars, ranging from well-known Snickers and Butterfinger, to Kit Kat, and to the hard-to-guess Mars bar. I cut them into pieces -- halves for the smaller bars and quarters for the full size bars -- then put them into bags with a number attached. I then made up a guessing sheet that had 15 blank spots for the kids to guess which which kind of candy bar was in each bag.

I didn't put a sheet out for the kids to see the answers. Instead, I made them hold on to their response sheets until the end of the program. I had them take a seat as I held up each numbered bag and they told me their guess. I had written on the sheets that anyone who got 10 of the 15 correct would win a prize, but seeing I had a ton of prize candy, I let anyone who got 5 or more right win.


The next station I'll talk about is the "Stack and Sort." This table had two events, since they were each shorter ones.

First, the "sort." I went through the bags of M&Ms and sorted them into 30-some bags of 75 M&Ms each, with a variety of colors. I didn't count out colors for equality, just the number of candies in each bag. For this event, kids paired up and competed against another pair to see which group could sort their M&Ms by color fastest. Not as easy as it sounds, since they're working together as teams and need to have a plan. When one team finished, they were winners and got to pick out a prize. Both teams then got to enjoy their bag of M&Ms before diving into the second activity at this table.

The "stack" also relied on team work -- the pairs each took turns adding one Oreo at a time to create a tower. They were racing against another team doing the same thing. Whoever made the tallest tower won a prize. The challenge to this was, of course, the team work and the fact that the team across the table also shook the table, making the tower bases a bit unstable. When the kids finished this task, they didn't get to eat the cookies. . . until everyone had gone. Then they were able to help themselves if they wished.


What we thought would be one of the less exciting stations actually became one of the favorites: the "Whopper Relay." As you can see, we laid a piece of tape across the floor, and we had two kids line up along the wall opposite that line. They were each given one Whopper, had to get on their hands and knees, and roll the Whopper with their nose from one side of the room to that line, then they had to turn around and roll it back. The first kid to make it both ways would win.

This was easily the funniest part of the program, as we learned some kids were pretty darn good at using their nose to roll a Whopper. Even the teens loved this station and found it as funny as we did.

One of our non-pictured events was called "Chocolate Pudding Pie Surprise," and it's one we used for the teens only (due to attendance). In this program, we made up 15 pies made of chocolate pudding and dropped 6 sour gummy worms inside each. Two kids sat across the table from one another, their hands behind their back, and they had to race to retrieve the gummy worms from inside the pie using only their mouths and teeth. They were given a cup beside their pie tin to drop them into, and when they believed they'd fished out all of the worms, they were able to call stop. The person who pulled all six out first won, and they got to get a prize. We also let the kids keep their pudding pies if they wished, and I have to say, I was pretty surprised everyone wanted to keep them...and the worms.

This station wasn't one everyone wanted to do for obvious mess reasons, which is one reason I think setting it up station style was a good way to go. And keeping it for a smaller group, too, helped keep the cost/mess down. We told all of the teens if they dropped their pie from the table, they'd be responsible for licking it up off the ground.

None of the pies ended up on the floor!


Because I still wanted Tweens to play with chocolate pudding, their station was Pudding Finger Painting. This station was one meant to be unmanned, but due to sanitary concerns, we did man it.

For this, we set up a big bowl of chocolate pudding, construction paper, plastic cups, spoons, and napkins out. We told the kids they needed to spoon their "paint" from the bowl and use their cup of pudding to paint. They almost all painted something about loving chocolate, then turned to enjoying the pudding from their cups. I had worries they would lick chocolate from their fingers or spoons and put it back into the big bowl, but no one did.

Another unpictured event we had for the teens was our dark chocolate Pictionary game. Using the same yellow construction paper and two packs of dark chocolate bars, the teens pulled a clue from an envelope (where my volunteer and I had created 40 different clues) and they were to draw the clue with the chocolate bar. This was, by far, one of the favorite events, as the kids loved how the dark chocolate drew just like a brown crayon (and they loved drawing things from Harry Potter to zombies to hotels and mail boxes).

When someone guessed the correct item being drawn, they won a prize and became the drawer. Eventually, though, this program became sort of self-directed, as the kids really just wanted to draw (then eat...) the dark chocolate. Fine with me!


For the tweens, we also did a "Chocolate Shuffleboard." As you can see, I lined up two tables, not precisely flush with the walls, and I had my volunteer put duct tape down as point lines. The kids got to pick their puck from the bucket (which had Baby Ruth, Crunch, and Butterfinger bars -- think different shapes and aerodynamics!). We made four point brackets, then two extra spaces indicated as X's on the tables, and the kids lined up in groups of 2-4 at the end of the table pictured. They had three shots to score points, and whoever in the group earned the highest number of points won.

Though this was one of those last minute adds to the program, the kids enjoyed it a lot and came back more than once to do it.

Finally, we did three "Chocolate Relays" outside under the tent, despite the oppressive heat. The first involved chocolate sprinkles and cups -- the kids lined up in equal teams (we did multiple rounds for the tweens and one round with bigger teams for the teens). The first person to go was given a cup of chocolate sprinkles and a spoon, and on the opposite side of the tent, there was an empty cup. The goal was for the teams to transport the sprinkles by spoon from their side to the empty cup on the other. When the first team emptied the cup they held, the race was over, and we judged which team had gotten the most sprinkles into the other cup. The point of the race, of course, is determining if going fast was better than going slow and steady or whether it was worth doing big scoops or small scoops of sprinkles.

After that relay, we did a second one. The kids stayed in their same teams, but this time, each was given a pair of oven mitts. The first person in each team put them on, then they raced down to the table on the other end of the tent, where a bowl of Hershey Kisses waited. With the mitts on, they had to unwrap the Kiss, eat it, throw out the wrapper, then run back to their team and swap mitts with the next person up. While it sounds easy, opening the Kiss is challenging with the mitts on, ESPECIALLY when the chocolate has begun melting from the heat. Because the adults were laughing so hard at the kids, we were challenged to try it ourselves -- and we did, like the good sports we are. It was challenging, but in a very funny way. The first team to have all their players complete the task won a prize.

The final relay we did only with the teens, and it was one we came up with on the spot. Each player on a team was given a spoon and instructed to put it in their mouth. The first player needed to come down to the table then scoop a Whopper out of a plastic cup with the spoon in their mouth (we held the cups for them). They then raced back to their team, where they had to pass the Whopper from their spoon to the spoon in the next player's mouth. Then that person ran down and deposited the Whopper into the cup again and so forth. It wasn't an easy one for them, either, as we told them if the Whopper fell on the ground, they had to pick it up with the spoon in their mouths. And yes, this happened more than once. As usual, the first team to finish the relay won.

Lessons Learned

I actually had a lot more chocolate left over than I anticipated, so I was very loose with my definition of "winning." I let anyone who wanted prize candy take it, especially in the end, so it would all disappear (and it did).

One of the things I was worried about was not having enough activities and the huge mess that would come at the end. Here's the thing: because it was so staff intensive and we couldn't lead kids around from station to station, it ended up working out perfectly. The kids picked where they wanted to go, and we let them do any activity they wanted to do multiple times. As far as the clean up was concerned, there really was no mess. The messiest activity was the sprinkle race, but because it was outside, we didn't really need to clean up much of anything. All of our indoor activities were done on tables covered in the $1 table cloths that made clean up as easy as wrapping up the mess on the table and tossing it. Simple!

Without doubt, this was fun for both me and the kids, and it's a program I would not only recommend but would do again. I have a ton of other activity ideas to keep it fresh if I did it in the future. It also gives me a lot of hope that my fall "Minute to Win it" program will be as popular as this one was.

Of Note

The thing that probably surprised me the most was that we had more boys than girls in both programs. And I loved how easily transferable the activities were between the age groups, too, and both the tweens and teens had equal amounts of fun doing the silly activities.

I think this is a program that could work for the whole family, too. Pricey, sure, but for an activity that brings this much joy to both the participants and staff (and not to mention the incredible photos we've got!), it's worth doing it.

Thursday, July 21, 2011

Going Green: A Recycled Costume Show

The theme of the week is no cost programming, and today's program at work was one of the favorites so far this summer: a recycled costume show.

I mentioned before that there are always programs you inherit when you start a new job, and this is one of the traditional summer programs at my library. I think it's a really cool program and one I plan on keeping around. It's easy to organize and cost free, and it lets kids of all ages express their creativity.

Supplies

This is an easy one: anything recycled. But start saving things well in advance of your program, and have your staff help out. I had bubble wrap, packing paper, cardboard, tinsel, toilet paper and paper towel rolls, cereal boxes, soda bottles, and other regularly recyclable materials. My supplies also included most of last year's summer reading club decorations, which meant there were a ton of shark fins, some plastic shovels and goggles, and, perhaps the crowd favorite, the wicker luau fans like these.

I then pulled out glue, scissors, yarn, stick on foam shapes, craft fuzz balls, tape, duct tape, and a handful of other supplies I wanted to deplete.

Set Up

In the past, this program has been held under our big outdoor tent, with a "red carpet" positioned in the middle so that at the end of creation time, the kids could walk the runway to the MC. That was the plan for this year until we had an extreme heat warning issued, and I decided it was best to keep this program inside. The contingency plan involved putting all the non-recyclables on the floor and the craft supplies on one table. We pulled together a punch of tables for the kids to create on, some with chairs and some without (as I've found, the kids are all different about their preference, so I leave it open).

I didn't want to miss out on the kids showing off their creations, so my contingency was a library parade. I told the kids 10 minutes prior to the end of the program, we'd go on a parade throughout the stacks.

Running the Program

Like with the beaded creations program, I made no plans. Instead, I made myself available to the kids for helping with cutting, knot tying, etc. I told the kids as they came to make anything they wanted to, and they did!

As soon as creation time was done, we lined up and took a tour of the library. Some of the kids thought this parade was the best part of the program because they got to have the attention of all the patrons. Everyone got to oooh and ahhh over their costumes. Costumes ranged from an incredible robot (body and helmit with a jet pack in the back!) to a mask with a straw attached (so she could wear a mask and still drink water), as well as crowns, wigs, and bubble wrap skirts. The teens who showed up made themselves an elephant hat (which she plans to wear for Halloween) and a mailbox hat. These kids were wildly creative and imaginative, and I'm eager to go through our photos, since I know I didn't get to see everything they made.

Once our parade was done, I took the kids back to our creation space and told them the program was over, but they should feel free to take any supplies they wanted to to continue their costumes at home. Lucky for me, many of them did, meaning I had fewer things to put back into storage for next year's costume show.

Lessons Learned

What I loved about this program was it really brought in all ages. I had very young kids and I had teenagers making costume pieces. They even helped one another out, which is always one of those end goals.

I had my intern helping me out with this program, but were I doing it again, I'd love more help. While it requires little in terms of set up and in instruction, it sure helps to have people around for clean up and for taking photos and helping kids with some of the harder tasks, such as cutting tape or making holds through cardboard, etc.

I'd also make the parade a bigger deal -- I can't get too down about this, though, since this was a serious last minute improvisation for the fact I decided not to hold the program outside in the heat. But the kids loved it so much, I do plan on doing that part again. The parents got a kick out of taking photos of their kids marching in the parade, and the kids liked to show off everything they'd made (and not all of them made costumes, so not having a runway show let everyone show off what they made, regardless of whether it was wearable or not).

This is a program I highly recommend for all ages, and it's one that can be done any time of the year, and one that could be particularly well done during April's Earth Week. What a way to encourage kids to recycle and to think about the ways the things they use every day can be re-purposed. We don't always have to teach through lecturing; sometimes, it's as simple as letting them create and discover.

Costs

$0.

Really, what do you have to lose?

Monday, July 18, 2011

Beaded Creations: A Tween Program

I ran a no cost and extremely easy program last week that brought in 15 tweens for over an hour of easy fun that encouraged their creativity and imagination. You read the first part right: no cost. I called the program "beaded creations," and it involved nothing more than the craft supplies that took up shelf space in my office.

Supplies

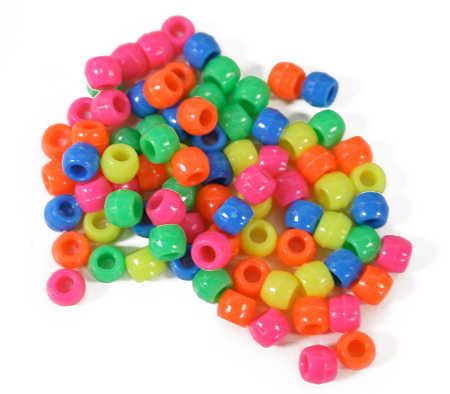
I cleaned my shelves and pulled out two boxes of beads. These included a huge tub of pony beads, as well as a number of smaller beads, fancy beads, alphabet beads, and crystal beads. I pulled out a few rolls of regular yarn, as well as fishing line thin string, some elastic, and some wire string. I still had a ton of safety pins left over from Canada Day and so I pulled those out, too. I also took out a couple tape rolls and a handful of scissors.

Set Up

I put all of the non-bead supplies on one table, save for a few pairs of scissors. That table was at the front of the room so when the kids entered, they went there first.

I grabbed a pile of bowls from our staff lounge and put a few on each of the four tables in our programming room, dumping a mix of beads into each bowl. I'm not a purist by any means, and I know I like the idea of discovery, so I mixed all the different kinds of beads together. Pony beads were hanging out with the Fs and Hs, and the crystal beads mixed with the triangle-style beads.

The Plan

Guess what? I had none. I didn't come up with any patterns, nor did I come up with any sort of jewelry for the kids to make. Instead, this was more of an open studio program, where the kids could make anything their minds could come up with. I find these programs work extremely well for this age group; they're so creative and during the school year, they're so regimented, they don't get the opportunity to just play like they need to. Yes, I said it: they need to play.

This program brought both boys and girls. The boys had just as much fun as the girls. The idea that jewelry is a girl thing isn't really common in this age group, honestly. They just want to have fun, and I'm all about encouraging it.

A couple of our boys made alphabet necklaces using all of the alphabet beads in a nonsensical way, and one of the boys found half beads he popped onto his pinkie fingers and played vikings with (then he made them party vikings by putting a ring on the fingers beneath the 'helmets'). Girls made necklaces, bracelets, and one girl used a ton of the pins to make a birthday necklace (then she gave me one of her creations to keep!).

Lessons Learned

This program was so easy and it was popular. The kids asked me to do it again, so it's one I'll definitely try out again in the spring.

Perhaps one thing I didn't think about was how much knot tying the kids would want me to do. I didn't mind it at all, but when they asked me to tie knots for their little rings, well, it was a test of my own finger dexterity (I have tiny hands, but not that tiny). I think if I do this again, I might splurge and buy actual fasteners for the jewelry so the kids could make longer lasting creations.

These sorts of programs are great for cleaning out your supplies and for encouraging creativity, and they work so well with the 8-12 year old set. You don't have to reinvent the wheel for successful programs, nor do you have to do a lot of planning or prep work. Sometimes keeping it as simple as possible is what you need to do: for the most part, these kids want a safe place to be that's not at home and they want to hang out with people their age, as well as adults who like spending time with them and laughing with them.

Wednesday, June 29, 2011

Let's go to Canada!: A Tween Program

This year's cooperative library summer theme for children is "One World, Many Stories." As part, I've incorporated a few (and I emphasize few) programs that involve travel or foreign activities. I'm not a stickler for themes, as I think they can be a bit stifling, but I took today's tweens-only program straight from the theme: Canada Day Celebration!

Like the US, Canada has a big independence day celebration, held every year on July 1. We got in on the celebration by offering up three crafts and a treat for our attendees.

First up, treat time!

I purchased a maple leaf shaped cookie cutter from Amazon, and it cost me less than $1.50. My coworker volunteered to make the cookies, which were simple sugar cookies, and I picked up 2 cans of white frosting and 2 shakers of red and white sugar crystals. Total cost was under $10, and we had between 80 and 90 cookies.

I set the supplies out and let the kids make their maple leaf cookies however they wanted. Most looked like this:


Then it was on to one of three crafts. Myself, along with a coworker and my intern, manned the craft stations. I handled the fireworks bookmarks. For this, I cut black construction paper into 1/4 strips. I hole punched the top of each and gave the kids red and white ribbon to tie. I ended up doing a lot of the tying but it wasn't a big deal. They wanted their ribbons to look like my sample.

I then let the kids lay down thick lines and shapes in glue however they wanted to. Then, they put their glue-covered black paper into a paper box lid and were given free reign over glitter.

Their creations ranged from things that kinda looked like the fireworks I made to something else entirely. I am a huge proponent of letting the kids make whatever art they want to make, so as you can see, it was a little everywhere. And little did I expect how popular this craft would be -- some kids made 4 or 5 book marks because they loved the free access to glitter.


The next craft the tweens did was make Canadian flag magnets out of fuse beads. My lovely intern was given the assignment to figure out how to turn red and white fuse beads into a Canadian flag, and she did an amazing job. We had only two of the small beds to do the flag making on, so this station was a slower one, but the kids who did it got a kick out of their final products.

Apologies for the blurry photo! If you're curious, that flag is made up of 93 red beads and 60 white, with 17 columns and 9 rows. I've included the actual pattern below (thanks Mary!):

We did the ironing of the flags when the kids finished putting the beads together, and then they were able to pop the small magnets on the backs themselves. A lot of the tweens found this to be the harder/more frustrating craft, but they all loved the end result (and let me tell you how fun it is to see a bunch of Canadian flags around the library).

The very last craft we had was a beaver pin. I found the pattern for this one right here. I picked up all of the small beads at Walmart, but let me tell you this: finding the pins was not easy. I went to multiple stores and had multiple trips before finding enough of the right size pins. Because the right size base pins were essential to fit all of the beads onto. But! There was triumph and we had all of the appropriate pins come program day.

They turned out extremely cute, and for the kids who didn't get a chance to finish, we were able to pack up some of the beads and pins for them to take home. Some of the kids wanted to make other things with their pins and again, we were game. One girl made herself a gold medal, even.

We had both guys and girls come out to the program, and it was enjoyed equally by all. We ended up having 22 kids, which is smaller than duct tape was, but still an extremely good showing for limiting the program to 9-12 year olds only. Plus, we got to celebrate Canada and the kids really got a kick out of it. It was familiar enough and foreign enough to them to be a total blast. I think the total cost was around $50 or $60, and we had a ton of left over beads and craft supplies for another program in the future, since we planned for almost 40. You could do this program on the cheap, especially if you have a lot of the supplies already.

Thursday, April 14, 2011

#RocktheDrop

I Rocked the Drop today.

Since it was rainy and gloomy in southern Wisconsin today, I couldn't leave my goods around town like originally planned, and since I was out of the library most of the day in a meeting, I did the next best thing.

First, the haul to be dropped:

I decided plopping them in my library's teen area on the big chair we have would be the perfect plan B.


I can't wait to go back tomorrow and see if any are there still or if they've all disappeared. I put a message up on our teen facebook page, hoping someone'll stop in for a nice little treat.

Friday, February 25, 2011

Baby Program: New Baby Bags


One of the programs we do for the littlest patrons -- and even the not-yet-here-but-will-be-soon patrons -- is making baby bags. These are library-provided bags requested by patrons who will be expecting or recently had a baby. It is an extremely simple and inexpensive way for patrons to know what's available at the library and make them feel welcome to use it for all of their newest family member's education and recreational needs (as well as their own!).

In our youth services area and in the adult non-fiction area, we have parenting sections. In both of those areas are the forms patrons can fill out that ask for their names, addresses/contact information, their due date, and whether they have other children (and their ages/gender). We do not ask for library card information because we see this as a way for new people to come into the library and because we serve such a huge population that changes depending on the season -- we have summer tourists who own summer homes here, and we serve a wide rural community that oftentimes have a library card with another library but can still patronize us.

The components of the bag are simple, and the items which come at an expense are paid for by our Friends group. Since we average around 2-3 baby bags per month, the cost really is minimal.

So what's inside?

  • The bag itself: this is our library's bag that usually gets sold for about $5. It's a blue tote with our library's image on one side, and as seen in the photo above, an applique of balloons. That job is done by our lovely Friends group. We have a stock pile of about 20 and since I've been there, we have only restocked once.
  • A congratulations card from me, with my business card inside.
  • Three tri-fold pamphlets that tell the recipient about our library services, give information about early literacy skills, and highlight the value of family time.
  • A MOPS flier and magnet (provided by our local Mothers of Preschoolers group)
  • A die-cut "B-A-B-Y" decorative sign.
  • A coupon for "baby's first library card."
  • Born to read stickers.
  • "Raise a reader" bookmarks.
  • Ten bookmark sized fliers from the public library early learning initiative of the Department of Public Instruction. You can download them all here. We put them on different colored pieces of paper, and we include appropriate fliers depending on whether baby has siblings or not. One of the huge things I love about these is they're already translated into Spanish, too.
  • Baby's first board book! We purchase Hello, Baby.
  • For those who will have brothers or sisters, we also include either I'm a New Big Brother or I'm a New Big Sister. I keep these for those who are younger, and I've been thinking about how I can better accommodate those who are older -- I've had a number of siblings who are 7, 8, or 9, and these books don't seem quite appropriate.
And that's all!

When I get a request, it usually takes me a couple days to pull everything together. It's such a simple, cost effective, and easy way to remind parents how much the library offers them as they begin a new chapter in their lives. And as someone who isn't particularly strong when it comes to working with babies, it makes me feel like I'm still offering them something important.

Book Club, Part Two

A longer post explaining my insanity will come soon, but I leave you with a series of photos to describe the second meeting of my high school book club.

We discussed this book:


By doing this:


And this:


You can't imagine the look of sheer delight on the face of a high schooler who enters a room for a book discussion and happens upon a table cloth covered with Legos. More soon!

Sunday, January 30, 2011

Easy programming: A movie birthday!


When I began my job in September, it was only a couple weeks into being the new kid I had to brainstorm programming for the new year. One of my philosophies as a librarian is to keep it simple. I don't see the point in creating something incredibly convoluted when something simple can be extremely effective.

So when asked what I wanted to do for one of my events during one of our school district's Fridays off in the dead of winter (stuck inside time with little excitement here in the cold snowy Wisconsin icebox), I thought throwing a birthday party for a movie would be a good idea. And wasn't I lucky that Disney's classic 101 Dalmatians happened to be celebrating its 50th anniversary? It always was one of my favorites and I thought, why not?

We set the party for January 21, and we were holding it at 1:01 p.m.

The party was extremely successful, pulling in 60 attendees, ranging in age from the littlest to the middle school crowd -- exactly the demographic I hoped to grab for this event. So what did we do?

I remind you: keep it simple.

First, I asked one of my coworkers to make up a spotted cake. I left it purposely vague, but I did suggest a spotted cake could be interpreted any way she wished, down to spotted frosting or even cupcakes (get it?). In the midst of thinking through other events, one of the local community members got wind of our event and came by my office asking if I'd be interested in having him bring his pet dalmatian to the party.

Now anyone who knows dalmatians knows they can be extremely high strung and aren't always the best parts. I spent probably half an hour with this guy talking with him about his dog, who happened to do events at the fire department periodically, and I decided to test my luck on having a dog at the event. I'm lucky enough to have not only a digital camera, but a digital photo printer, as well. I knew immediately we'd have an opportunity for the kids to each have their photos taken with the dog and take the souvenir home immediately. Any parent can tell you that a photo like that is more fun and valuable as a program takeaway than a plastic toy of some sort.

So, cake and a dog. What else could we do? At any good birthday, what do you do?

I didn't have to think too much or too long to come up with pin-the-tail-on-the-dalmatian. I did a little Googling and pulled up this dalmatian puppy image which featured an excellent tail, and then I blew it up using this program. When I printed the poster, I cut the tail out separately, then reprinted the poster post-photoshopping the tail out of the image (that way I got a full size tail and then a full-size poster sans-tail). Because the poster printed up pixelated from being stretched out, I took a black sharpie to it. Easy peasy. Now I had an image that I could tape together and make a larger poster.

At any good kid party, there's also face painting. I had a coworker kind enough to help out by manning a station to face paint the kids into dalmatians. We had a box of face crayons and pulled them out to use. We didn't limit the kids to black and white; we let them become green or purple dalmatians if they wished.

And last, but certainly not least, I brought 2 craft activities for the kids. The first was exceptionally simple: I printed out six different 101 Dalmatians coloring sheets and brought out my huge tub of crayons (which is a big deal, since we just have a small one in our children's area). I ended up moving this activity from our programming room to the children's room since our programming room has a capacity of 30 (and 60 is more than 30. . .) but no one complained.

The second crafty activity was making a dog tag. I used the die cut to make about 50 round tags (which look suspiciously like fish bowls when you don't put a hole punch in the top), as well as about 50 heart tags. I cut plenty of thread for the actual necklace part and pulled out a tub of glitter paint, glitter, markers, and stickers. This was a total hit, as anything that lets kids make a mess should be.

Tables were set up around the programming room, and the cake and cupcakes were on display in the middle with a couple of cool dalmatian posters. When the program began, we all sang "Happy Birthday" to the movie, then let everyone meander from table to table. The kids loved meeting the dog, playing pin-the-tale, and, of course, enjoying cake!

One thing I forgot to mention about the program: one of the original goals was to collect food donations for our local shelter. I don't think we did a great job advertising that, since we picked up only a couple of boxes of dry food. If I were to do this in the future, I'd plug it harder, but there is no denying that 60 in attendance was an awesome success for such a simple program. I think in total, it was about 2 hours of prep for the program -- and it was completely worth it. Parents and kids left happy, and we were able to involve community members, as well as play to the strength of employee talents we had.

If you're looking for an easy program and one with guaranteed fun, think simple. No need to do something wild. And as always, feel free to steal this. Remix it and make it your own or feel free to steal it 100%.

Sunday, October 31, 2010

The best (and most stressful) program ever

When I began my new job, I inherited some tried-and-true programs. This is one of them, and it's one I will continue over and over. Despite how much work and stress it is, it was completely worth it for a final attendance of 121. That isn't counting the 30 or 40 people the next day that I sent home with pumpkins, either.

What is this program, you ask? Pumpkin carving.

What you need: pumpkins, buckets of water and rags for cleaning, carving tools, table cloths, apple cider, napkins, hand wipes, plastic bags for seeds, heavy duty black garbage bags, and crafting supplies. For crafting supplies, I purchased a mega box of sharpies, paper for kids who wanted to practice their drawing, pom poms, pipe cleaners (the biggest hit!), stickers, sequins, and tacky glue.

Nuts and Bolts: The biggest stress of this program is finding pumpkins, since every attendee who wants one gets a pumpkin. I called around to a number of local farms, and I had 2 farms that donated a total of about 160 pumpkins. If you aren't so lucky to get such a donation, ask your local retailers for discounts on a large lot. Some stores sell them at $2.99 each, and if you can get 100 for half price, it's still not that expensive.

All of the pumpkins needed to be transported, and between a coworker and myself, we did it in 3 trips. It took a few hours and a lot of manual labor, since our programming room is downstairs in our building. We borrowed a cart from the store next to the library, piled them in, then lined the perimeter of our programming room with pumpkins. Naturally, we had a few other programs prior to the pumpkin carving one, so we needed to keep some space clear.

Prior to the program: We clean and gut the pumpkins before the program in order to make it run smoothly. Our room capacity is 35 without tables and chairs; with tables for carving, it's probably more like 25-30. To get 120 people in and out within 4 hours we have to do some work beforehand. If the idea of cleaning and gutting 160 pumpkins overwhelms you, think about the community resource you already have: teens needing service hours.

I'm lucky to have some regular volunteers and their families who eagerly volunteered. One mom wanted to so she could take all of the innards home for cooking (which I was game with). In addition, I put a call out to the sponsor of our high school's National Honors Society; from that alone, I got an additional 10 volunteers. I also put an announcement into the school's daily announcements and begged a good friend of mine to help. All together, I had 20 volunteers who came. Oh, I forgot: I advertised free food. I got a deal with the pizza shop next door to give us 7 pizzas for $50 (I am a HUGE proponent of not asking for free things from local vendors -- I ask for discounts because I believe all businesses deserve the actual business. Too many hand outs isn't good partnering). I also picked up a bag of candy and a few bottles of pop.

We made it an assembly line: a few people cleaned pumpkins with the bucket of water and rags; my friend and I cut the tops off the pumpkins (since I'd rather we get hurt than the teens); and then we passed the pumpkins off to the teens who gutted them on the table clothes I had laid on the floor. I told the teens they were welcome to take home seeds if they wanted to separate them from guts and had plastic bags for them to do so. As soon as they finished cleaning out the pumpkins, they relined them up along the wall and waited for their next one. With that many volunteers, we were done with cleaning in an hour and a half. The kids got service hours, free food, and time to hang out with their friends.

I also contacted our local newspaper about the program a week prior to the event. We had a member of the press show up and take a ton of photos. This ended up being prime opportunity to tell him who donated the pumpkins, and I'll be thrilled to see the photo spread in next Sunday's newspaper! Perfect pr opportunity for the library and our generous donors.

The Program: The next morning after story time, I pulled out 7 tables and covered them with new table clothes. One table had cider and cups, one had craft supplies, and all of the others just had an assortment of cutting utensils. The table with cider also had a sign thanking our pumpkin donors and thanking the volunteers from the night before.

I sat by the door and let people come in in groups, limiting capacity to the best of my ability without cutting families apart. They were told they could pick out their pumpkins and have fun. After they finished, I took a photo of each group with their creations, which apparently was the thing some of the kids MOST looked forward to (one ran upstairs to our adult services area and told the librarians there they got their photo taken - too cute!).

We did have a backup with people at the beginning, so my boss pulled out tickets and numbered them. I then called ticket numbers to let people in. No one seemed to mind waiting since it wasn't a lengthy wait to get in, and I had pulled out a ton of new coloring sheets and had them available in our youth services room for families to use.

Aftermath: When the program ended at 4 p.m., the floor was a mess. Thanks to the table cloths, tables were mostly clean, but the floor was another story. Craft goodies were everywhere. But fortunately, after sweeping the floor of the big pieces and then vacuuming carefully, clean up was finished in 30 minutes with two people. That was worth it for the crowd, the work, and the endless thank yous we got for this program.

We had tons of pumpkins remaining after this program, and the next day, I offered them to anyone who came in the library. So many people were thrilled to take one home -- and we had even hidden some small ones that stayed ungutted for those who really wanted to have seeds or pumpkin pie.

Lessons Learned: I followed notes from my predecessor about cider quantity, and I wish I had purchased a little more. No one complained at all, but I think more people would have taken advantage of it had I had more. I would also invest in an additional electronic cutter or two and I would probably bring out more craft supplies. My other big lesson was that I should have pulled out the photo printer: I think families would have LOVED taking home a photo of their creations.

Other information: I get asked a lot about the size of my library with the turnouts we get, and I will say my community is about 8,000 people. We do not take sign ups for this, nor do we expect people to even have a library card. So, turn out can be tough to gauge but since this program has gone on for a few years and gets nice press, we know it grows. In fact, this year's turn out was the highest yet (and the turn out for the night before for clean out was a huge leap from the year before). This is the kind of program that would work best in smaller libraries or in branches. You could make this a sign up only program to get an idea of numbers, but always be prepared for those who just show up. I hate turning anyone away and I'm fortunate I did not have to do it for this one.

Bonus program: My coworker runs our on-site storytime and was able to use the small pumpkins we chose not to gut for her storytime craft. Again, the kids and parents love it and thank us for letting the mess be made at the library and not their home.

Total cost: After the pizza, pop, candy, and new supplies we needed to purchase, I spent probably around $110-120. For a turnout that huge and the press we'll be getting, it was worth every penny.